This will be a series of posts updated with each major change or novelty as this project progresses.
Well, the mini computer finally arrived at my house. After powering it up, testing the hardware, and choosing an interesting place to put it, it was time to get Windows 11 off that disk.
Getting Started
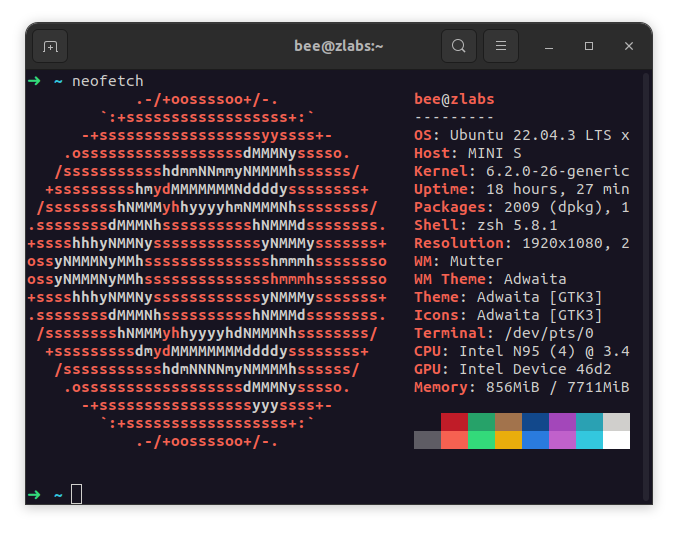
In the first post I pointed out that I had doubts whether to use a hypervisor or a Linux distribution with some containerized applications. For this first version, I chose the last option and installed Ubuntu 22.04 LTS with Docker, Docker Compose and some other auxiliary tooling (tmux and zsh for the win!).
One of the most well-known applications for domestic networks is the Pi-hole. In addition to being a great filter for ads and trackers, the interface with dnsmasq makes it very easy to manage local DNS records. So I started with it.
However, following a suggestion in the docker container installation repository, I first set up a container with a reverse-proxy to get easy and manageable access to other applications that will be deployed in the future.
The Proxy
As recommended, the reverse proxy used here is nginx-proxy. The thing about nginx-proxy for docker is that it gets information about new containers in near real time and updates the proxy settings according to the metadata specified in the new container. This is all achieved mainly by docker-gen, the Nginx project that generates template-based files according to container metadata obtained via docker socket.
For the reverse-proxy to work as I plan, I need three things in summary:
- That docker.sock is mounted inside the proxy container so that it can obtain information about container creation and deletion events;
- That the proxy container and the other application containers share the same virtual network and;
- That the other application containers to be proxied have the env variable VIRTUAL_HOST with the value corresponding to their virtual hostname.
To address the first two points, nginx-proxy’s docker-compose looks like this:
version: "3"
services:
  nginx-proxy:
    image: nginxproxy/nginx-proxy
    ports:
      - '80:80'
    volumes:
      - '/var/run/docker.sock:/tmp/docker.sock:ro'
      - "nginx-conf:/etc/nginx/conf.d"
      - "nginx-vhost:/etc/nginx/vhost.d"
    networks:
      - nginx-proxy
    restart: always
networks:
    nginx-proxy:
      name: nginx-proxy-net
volumes:
    nginx-conf:
    nginx-vhost:
For convenience (for now) everything will be accessible through port 80 of the server. I then specify the volume with docker.sock to be mounted as indicated by the proxy documentation (attention to the read-only permission) and also mounted two volumes for general and virtual host configuration, in case I need it in the future. Finally, I set the “nginx-proxy-net” network (terrible lack of creativity) that should be used by the other containers as well.
A clear improvement point in this compose is the use of the separate containers approach so that docker.sock is mounted in a different container than the externally accessible one, even if docker.sock is mounted with read-only permissions. I will do this soon!
After the deployment of the proxy, which also leads to the creation of the virtual network, comes the pi-hole.
The Pi-hole
Briefly, it’s docker-compose looks like this:
version: "3"
services:
  pihole:
    image: pihole/pihole:latest
    ports:
      - '53:53/tcp'
      - '53:53/udp'
      - '8053:80/tcp'
    volumes:
      - './etc-pihole:/etc/pihole'
      - './etc-dnsmasq.d:/etc/dnsmasq.d'
      - './log/pihole.log:/var/log/pihole/pihole.log'
    networks:
      - nginx-proxy
    environment:
      VIRTUAL_HOST: pihole.home.lan
      VIRTUAL_PORT: 80
      NETWORK_ACCESS: internal
    restart: always
networks:
  nginx-proxy:
    external: true
    name: nginx-proxy-net
The ports 53 and 8053 of the container are bound to the host so that other devices on the network can perform DNS queries and so that I can access the pi-hole dashboard even with the local DNS settings not finished. Then, I configure volumes for the application configuration files (mainly to be persistent in case of container restart). Then, as previously mentioned, I configure the network to be used by this container as the same network used by the reverse proxy (at the end of the file I use the “external” flag to specify that the network is not managed in this compose and finally give a custom name to it). Finally, I configure some env variables necessary for the proxy to work correctly (in addition to the pi-hole variables, which were omitted in this post): The virtual hostname for pi-hole access is “pihole.home.lan” on port 80 of the container (accessible only through the virtual network) and its access should only be allowed for private IPs, in case I expose the server to the internet in some way in the future.
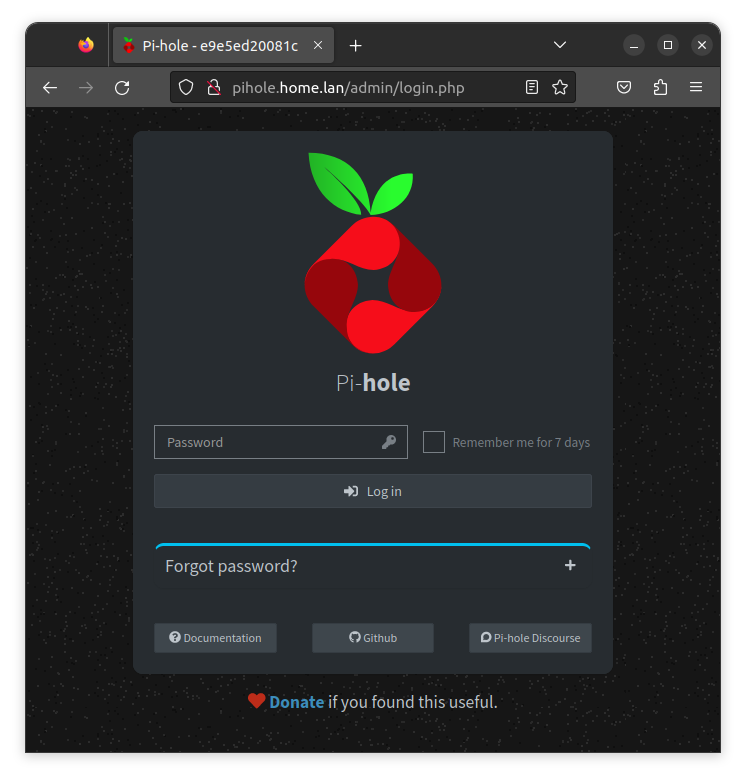
At this point, after deploying the pi-hole, I can already access it through the server’s IP on port 8053 and perform the first settings. So, after configuring pi-hole as my router’s DHCP server DNS and configuring the server’s IP to be fixed, I configured the local DNS record “home.lan” to point to the server and added a CNAME “pihole.home.lan” pointing to the it record.
Now I can access the pi-hole in a more elegant way, making use of all the convenience that the reverse proxy can provide me:
To finish off this first step, I thought it would be nice to have a homepage for the home.lan root domain. So I created yet another docker-compose :)
The Homepage
To keep myself in the same ecosystem, I used a compose example of an nginx server with a static html page. The docker-compose file looks like this:
version: '3'
services:
  nginx:
    image: nginx:alpine
    networks:
      - nginx-proxy
    volumes:
      - './nginx/default.conf:/etc/nginx/conf.d/default.conf'
      - './www/:/usr/share/nginx/html/'
    environment:
      VIRTUAL_HOST: default.home.lan
      VIRTUAL_PORT: 80
    restart: always
networks:
  nginx-proxy:
      external: true
      name: nginx-proxy-net
This docker-compose specifies the webserver configuration (which is described below), specifies the virtual network to use (as I mentioned), and the virtual hostname and port for this application.
For this page to be the content delivered by default by the reverse proxy, the environment variable “DEFAULT_HOST: default.home.lan” required to be added to the reverse proxy docker-compose, as indicated in the documentation:
services:
  nginx-proxy:
    [...]
    environment:
      DEFAULT_HOST: default.home.lan
    [...]
To give a bigger context, it is important to point out that the folder where this homepage docker-compose is located has the following content:
.
├── docker-compose.yaml
├── nginx
│   ├── default.conf
└── www
    └── index.html
The nginx configuration file has the following content:
server {
	listen 80 default_server;

	server_name home.default;

	root /usr/share/nginx/html/;
	index index.html;

	location / {
		try_files $uri $uri/ /index.html;
	}
}
It specifies the port on which the content will be served, the server name, the location of the index file and the behavior of always serving the index file for any path.
The html I’m using is a simple page that follows the same format as the homepage of the dmaorg.info website, which is part of the Twenty One Pilots lore (I’m a big fan)
<!DOCTYPE html>
<html>
  <head>
    <style>
      html, body {font-size: 12px;
                  color: white;
                  margin: 0;
                  padding: 10px;
                  background-color: black;
                  font-family: Courier, Lucida Sans Typewriter, Lucida;
                  font-weight: 600;
                  letter-spacing: .15em;}
    </style>
  </head>
  <body>
    <h1>200 OK_</h1>
    <p>Welcome home</p>
  </body>
</html>
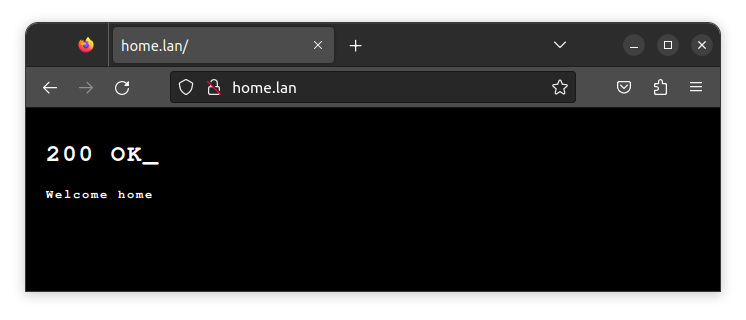
Having deployed this docker-compose, I can now access “home.lan” and no longer receive an error from nginx:
Wrapping up
An overview of the applications so far is as follows:
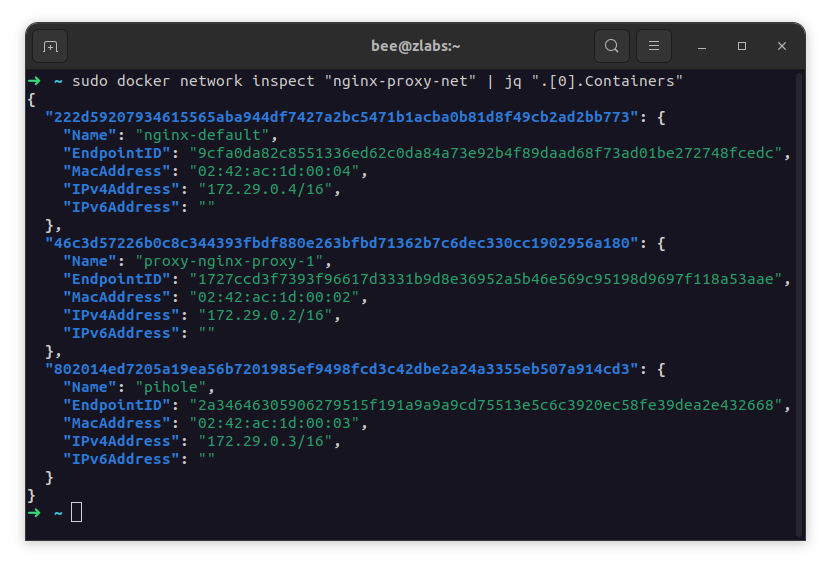
Pi-hole and Homepage are two containers that share the same virtual network called “nginx-proxy-net”. This network is also used by the nginx-proxy container, which uses the docker socket to listen to container creation and deletion events and automatically configure itself to route requests to these containers according to the hostnames and ports configured in the environment variables of each.
In order to have a more practical notion of network sharing, the docker command to inspect a specific network displays which containers are connected to it and their respective IP addresses (I’m using jq here to filter the results):
With all that in place, I believe my next step now is to set up dynamic DNS and a VPN to access my local services from anywhere.
See you soon!